Azure databricks workspace users can securely and easily access azure data lake storage (ADLS) by creating a mount point in azure databricks. This article walks through the steps for creating a mount point using service principal and azure key vault-backed secret scope.
Requirements
- Permissions to register an application with azure active directory
- Azure key vault
- Azure data lake store Gen2 with hierarchical name space enabled
- Azure databricks (standard plan or premium plan)
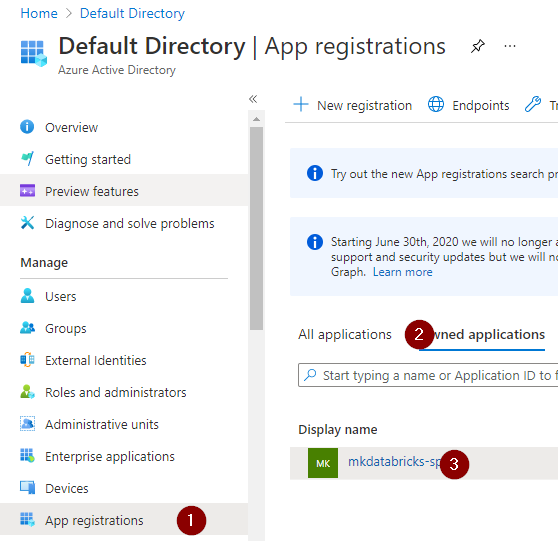
Step 1: Register application with azure active directory
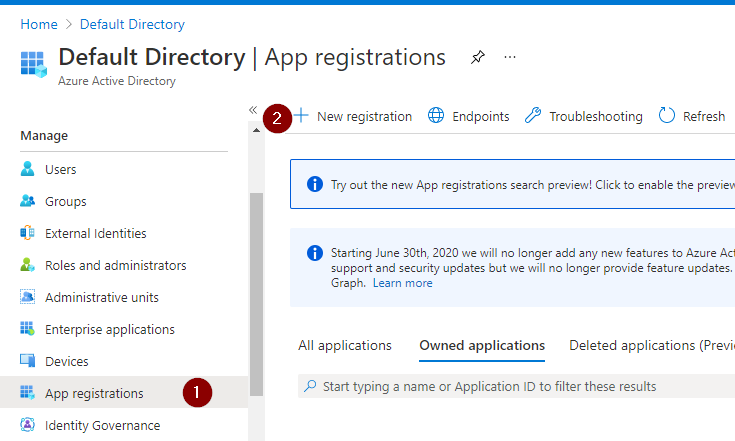
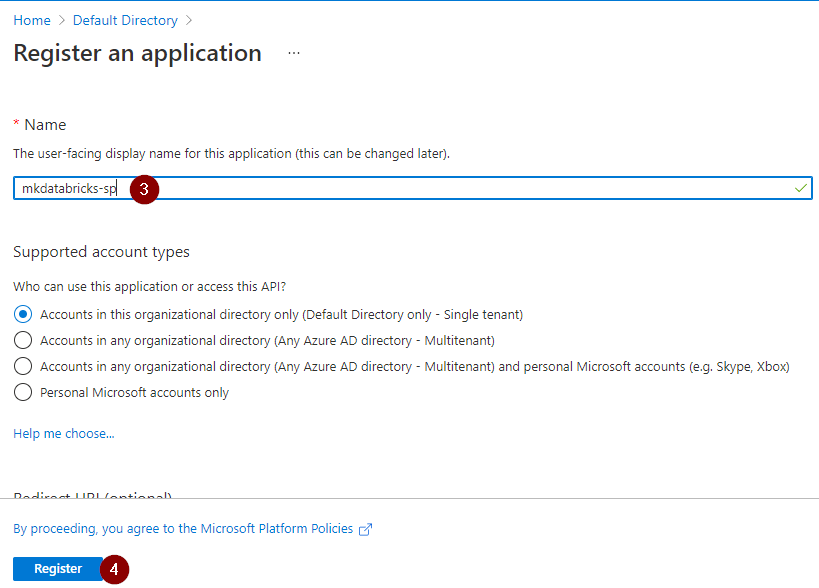

Imp note: Don’t forget to copy and save the client secret value which we will be adding to the azure key vault
Step 2: Copy and save client ID and tenant ID
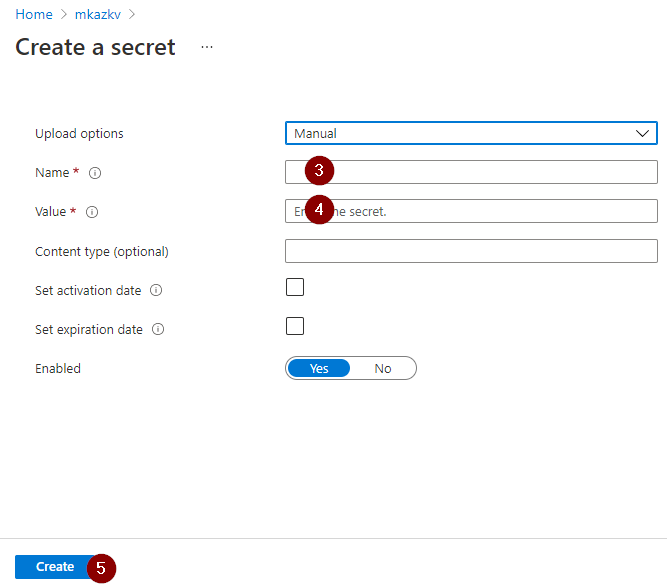
Step 3: Save secrets to azure key vault
3.1 Add the client ID copied in the step# 2 to the azure key vault
3.2 Add the tenant ID copied in the step# 2 to the azure key vault
3.3 Add the client secret created in the step# 1 to the azure key vault
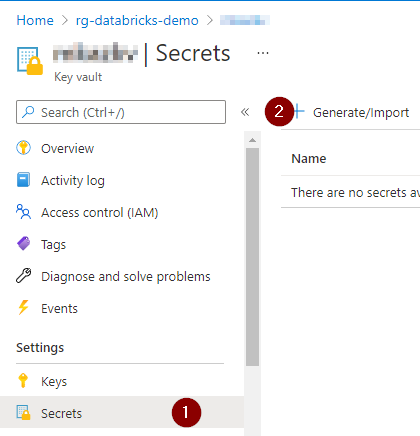
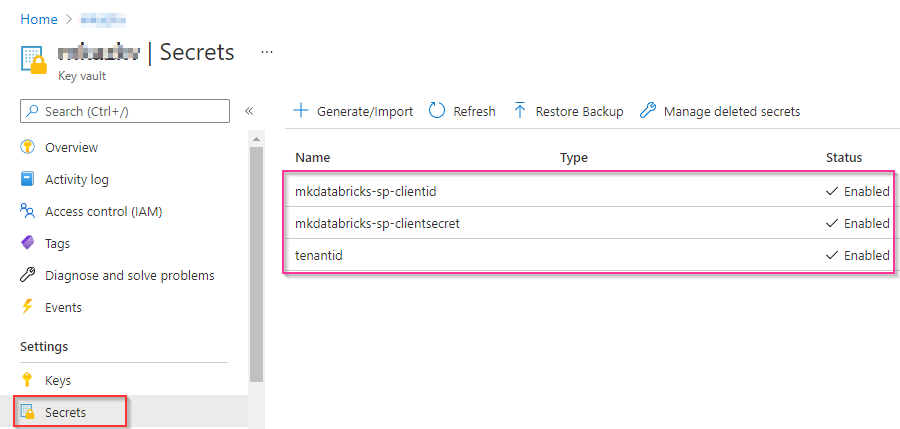
3.4 Verify the list of secrets added to the key vault before proceeding to the next step
Step 4: Copy and save azure key vault URI and resource ID
Step 5: Create key vault-backed secret scope in azure databricks UI
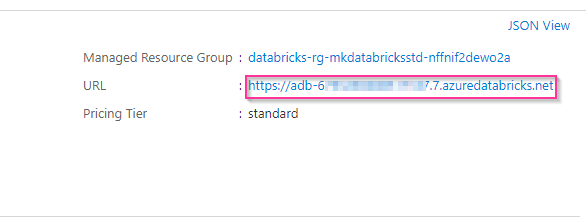
5.1 open azure databricks service from azure portal and copy the databricks service url
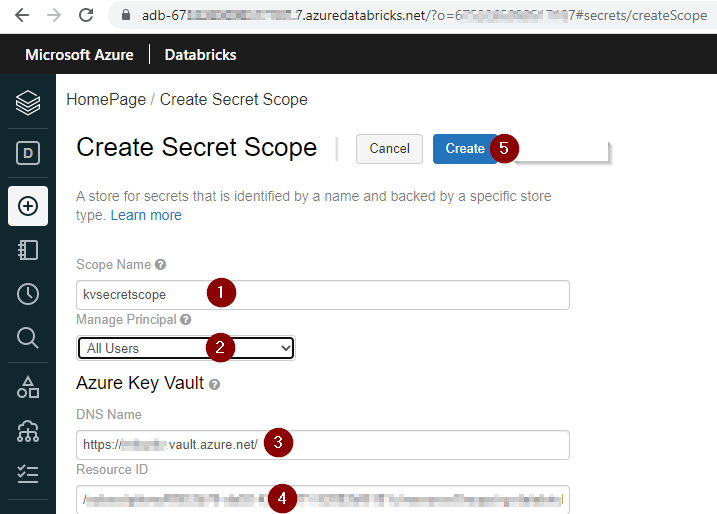
5.2 append /#secrets/createScope to the azure databricks workspace url in a new browser window to create a secret scope
- enter a scope name
- select All users from the Manage Principal drop down if your azure databricks workspace is standard tier.
- enter the azure key vault URI copied in step# 4 in the DNS Name
- ener the azure key vault resource ID copied in step# 4 in the Resource ID
- click create
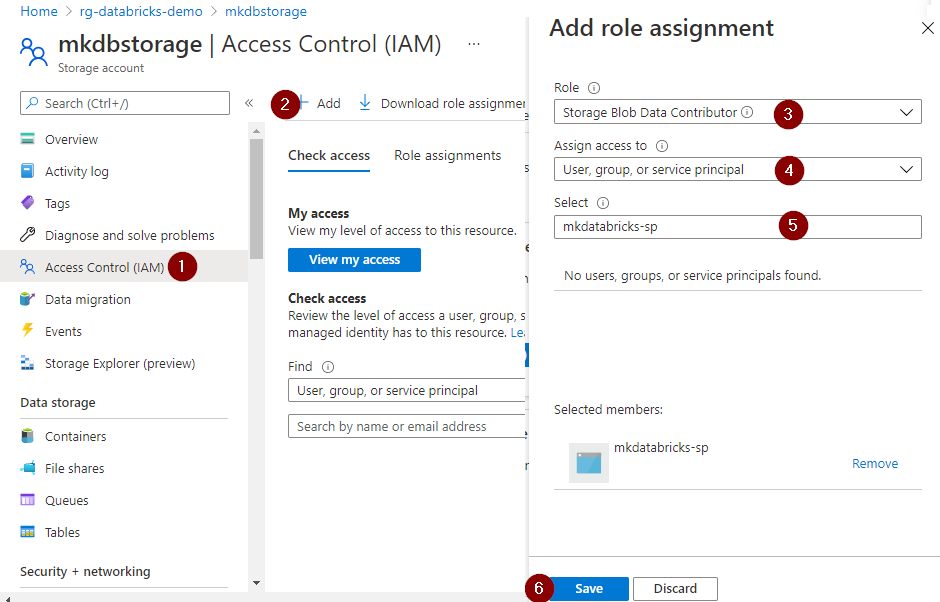
Step 6: Assign azure role to the azure AD application
Assign the Storage Blob Data Contributor role to the azure AD application created in step#1. Refer to Role-based access control (Azure RBAC) to learn more about the azure built-in roles to access storage resources.
Step 7: Mount azure data lake storage in azure databricks
if you have completed all the previous steps successfully then get ready to complete the final step to create a mount point to access azure data lake storage from the azure databricks.
- Create a container named as sample-datasets in azure data lake storage account
- Create a python notebook in azure databricks and copy the below code to create a mount point
- Replace the scope name with scope name created in step# 6
- Replace the key name with key name created in step# 3
1
2
3
4
5
6
7
8
9
10
11
12
13
14
15
16
17
18
sp_clientid = dbutils.secrets.get(scope="kvsecretscope",key="mkdatabricks-sp-clientid")
sp_clientsecret_value = dbutils.secrets.get(scope="kvsecretscope",key="mkdatabricks-sp-clientsecret")
tenantid = dbutils.secrets.get(scope="kvsecretscope",key="tenantid")

oauth_endpoint = "https://login.microsoftonline.com/"+tenantid+"/oauth2/token"
adls_container_name = "sample-datasets"
adls_account_name = "mkdbstorage"
adls_source = "abfss://{}@{}.dfs.core.windows.net/".format(adls_container_name,adls_account_name)
mount_point_name = "/mnt/sample-datasets"

configs = {"fs.azure.account.auth.type": "OAuth",
          "fs.azure.account.oauth.provider.type": "org.apache.hadoop.fs.azurebfs.oauth2.ClientCredsTokenProvider",
          "fs.azure.account.oauth2.client.id": sp_clientid,
          "fs.azure.account.oauth2.client.secret": sp_clientsecret_value,
          "fs.azure.account.oauth2.client.endpoint": oauth_endpoint}

if not any(mount.mountPoint == mount_point_name for mount in dbutils.fs.mounts()):
    dbutils.fs.mount(source = adls_source,mount_point = mount_point_name,extra_configs = configs)
Let’s write sample data to adls using the mount point.
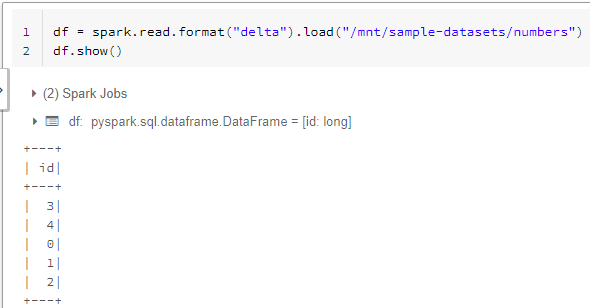
Let’s read data from adls using the mount point.
Congratulations!!! you have successfully created a mount point to securely and easily access the data from azure data lake storage.


